The Art of the Drizzle: Mastering the Professional Food Photography "Pour Shot"
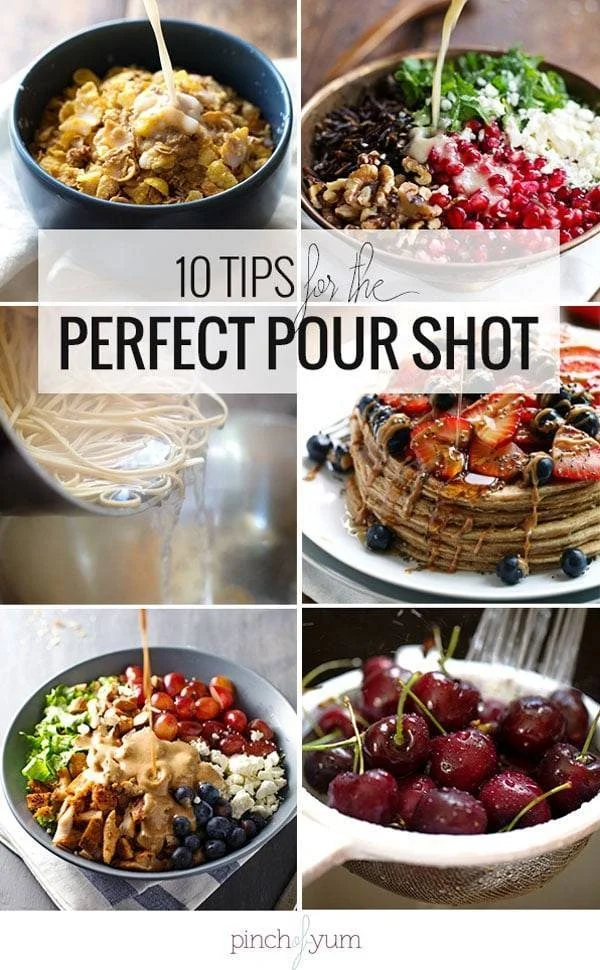
In the competitive world of food blogging and digital culinary content, the "pour shot"—that dynamic, high-energy image of sauce, dressing, or syrup cascading over a dish—has become the gold standard for engagement. These images promise freshness, flavor, and an intimate, "in-the-moment" experience that static shots of plated food often fail to convey. However, beneath the polished surface of every viral Instagram post lies a reality defined by trial, error, and a significant amount of cleanup.
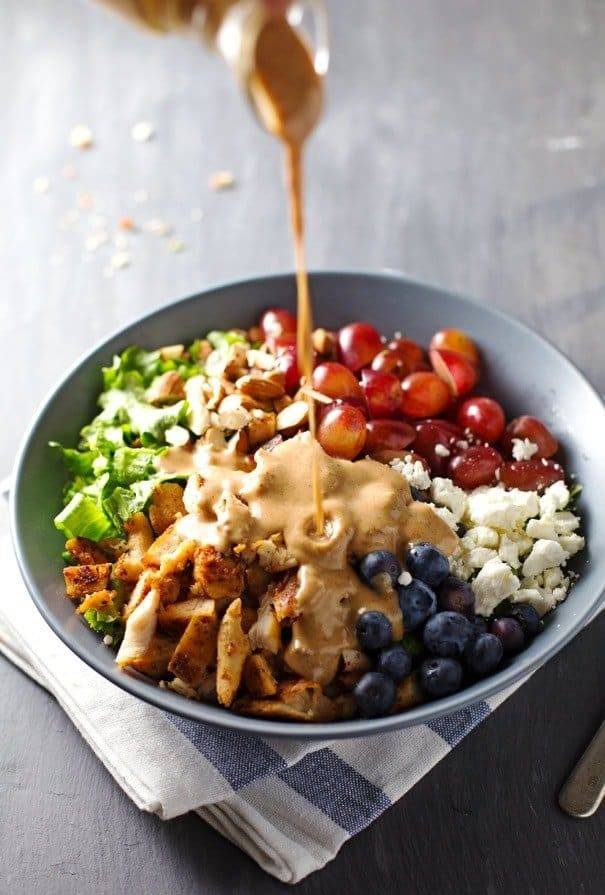
Achieving the perfect pour requires more than just a camera and a recipe; it demands a fusion of technical precision, intentional equipment selection, and a rigorous, iterative process.
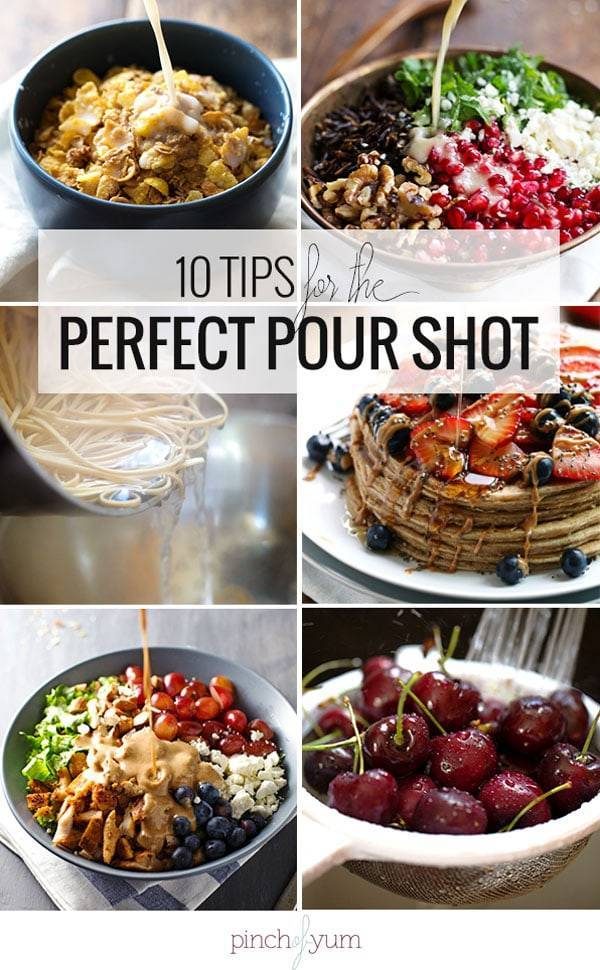
The Anatomy of a Perfect Pour
At its core, the "pour shot" is an exercise in timing. Unlike traditional food photography, which relies on stillness and long exposure times to capture texture, the pour shot is a high-speed action sequence. The primary goal is to freeze the liquid in mid-air, creating a crisp, clean stream that draws the viewer’s eye directly to the most appetizing element of the dish.
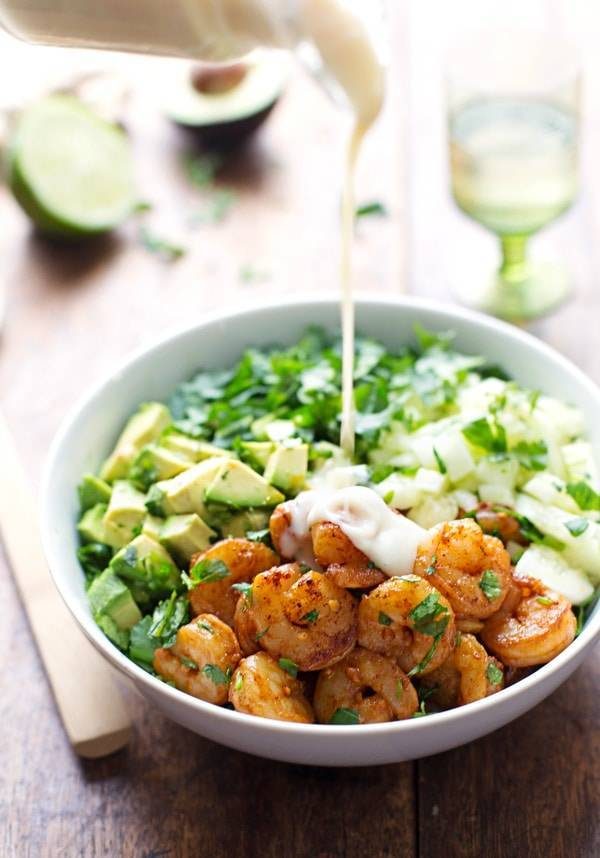
Industry experts note that the "blobby" effect often seen in amateur attempts is rarely a result of bad luck; it is a symptom of improper camera settings or poor physical execution. Capturing the movement requires a shutter speed fast enough to eliminate motion blur, a sharp focal point, and, occasionally, a bit of culinary "cheating" to ensure the viscosity of the sauce behaves as intended under studio lights.
A Chronology of the Craft
The evolution of the pour shot has mirrored the rise of social media-driven food culture.
- The Preparation Phase: Photographers often spend hours setting up their scenes, ensuring that the lighting—typically natural light or a soft, diffused studio setup—is consistent.
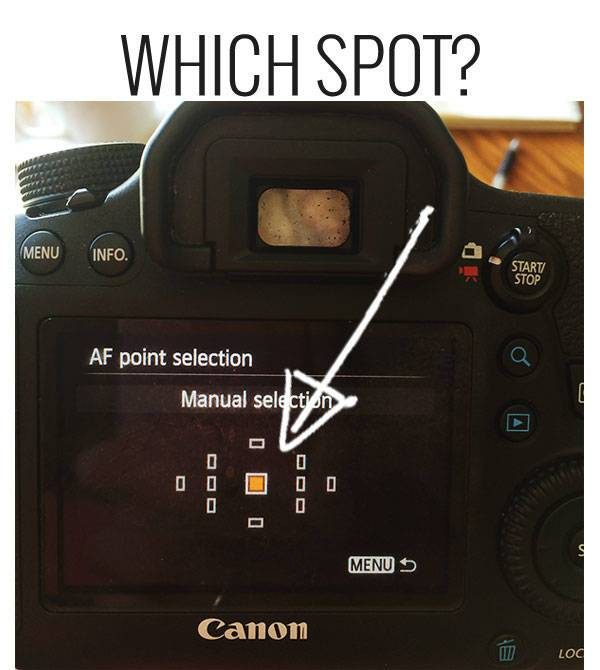
- The Calibration Phase: Before the sauce ever hits the food, the camera must be set. This involves selecting a manual focal point, usually on the surface where the liquid is intended to land.
- The Execution Phase: This is where the "800 failures for one success" rule comes into play. The photographer, often working alone, must hold the camera, trigger the shutter, and pour the liquid simultaneously—a feat of multitasking that often leads to spills.
- The Post-Production Phase: Even with a great shot, photographers often utilize editing software to adjust contrast and clarity, ensuring the liquid pops against the background of the food.
Technical Pillars for Success
For those looking to transition from amateur snapshots to professional-grade imagery, ten specific technical considerations have emerged as the industry standard.
1. Equipment Selection: The Vessel Matters
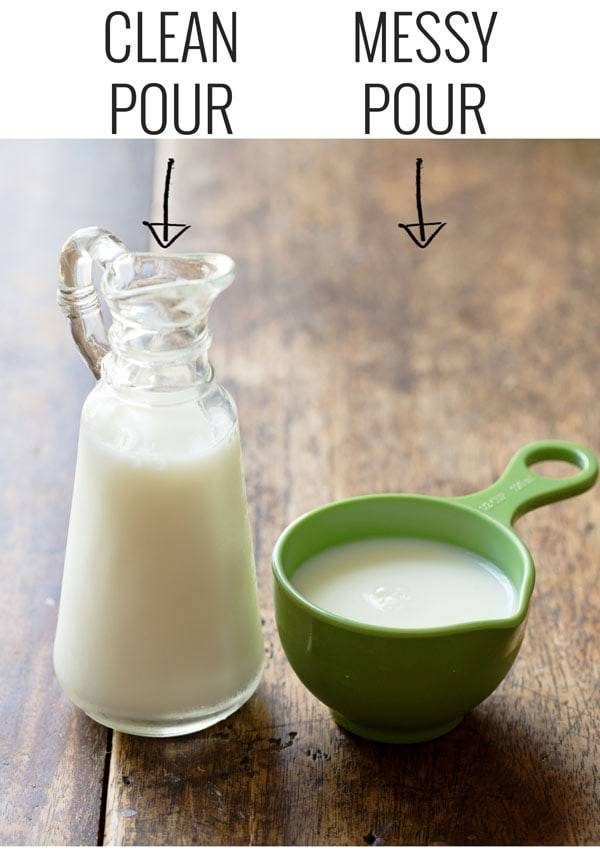
The container used for pouring is the first variable in the success equation. While measuring cups are common in kitchens, their wide, non-tapered edges often create a messy, uncontained stream. Professionals prefer vessels with long, narrow, or tapered spouts. This design ensures that the liquid exits in a concentrated, controlled flow rather than a broad, unpredictable splash.
2. Shutter Speed and Motion Control
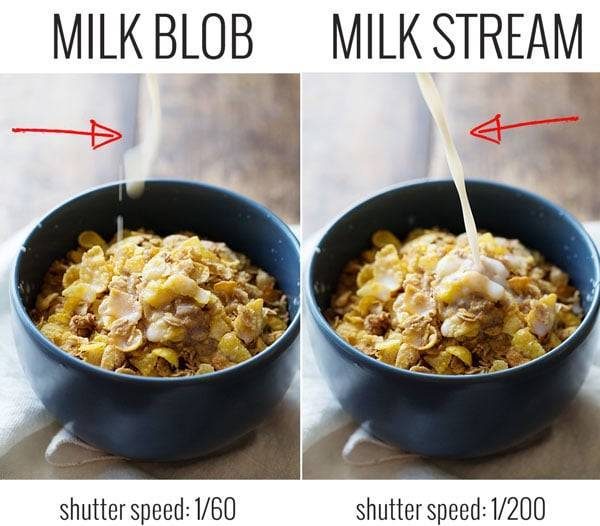
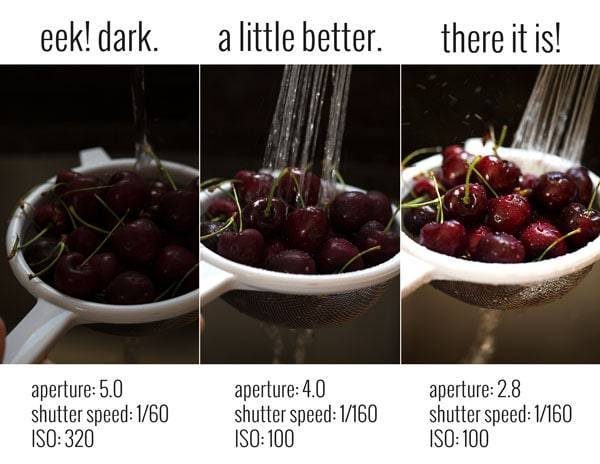
In standard food photography, a shutter speed of 1/60th of a second is common. However, for a pour shot, this is far too slow, resulting in a blurry, "ghost-like" stream. Increasing the shutter speed to 1/200th of a second or higher is essential to freeze the action. As shutter speeds increase, light intake decreases, requiring the photographer to compensate by adjusting their ISO or aperture settings.
3. Manual Focus and Focal Zones
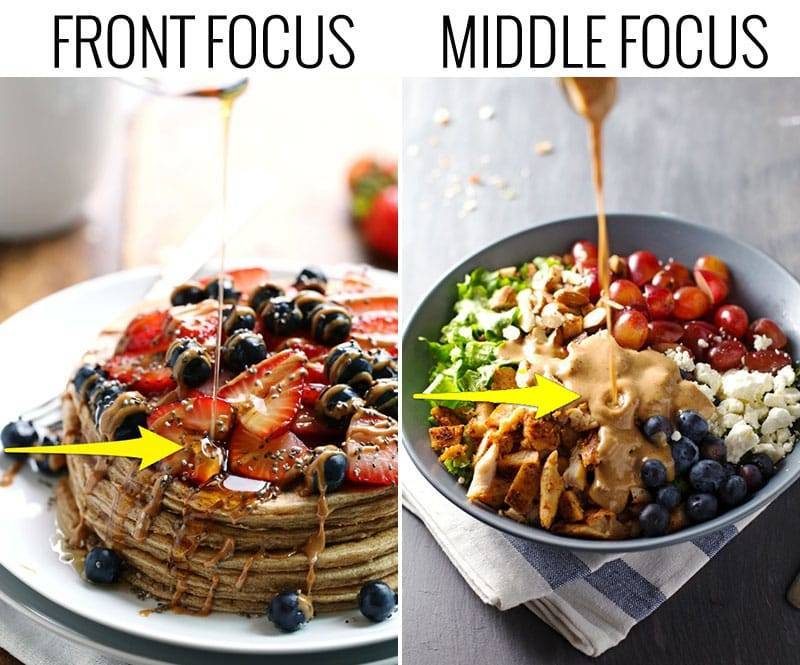
Autofocus systems often struggle with moving liquids. By switching to manual focus or pre-selecting a specific focal point on the camera, photographers can "lock in" the landing zone. By pressing the "Q" menu on most modern DSLRs, users can manually select a focus point, ensuring the camera doesn’t attempt to hunt for focus mid-pour.
4. The Power of Contrast
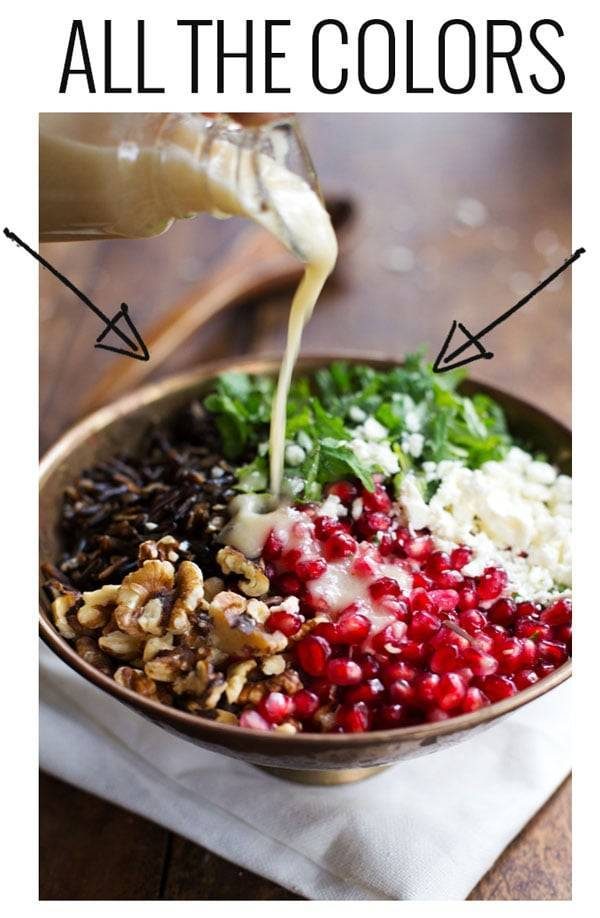
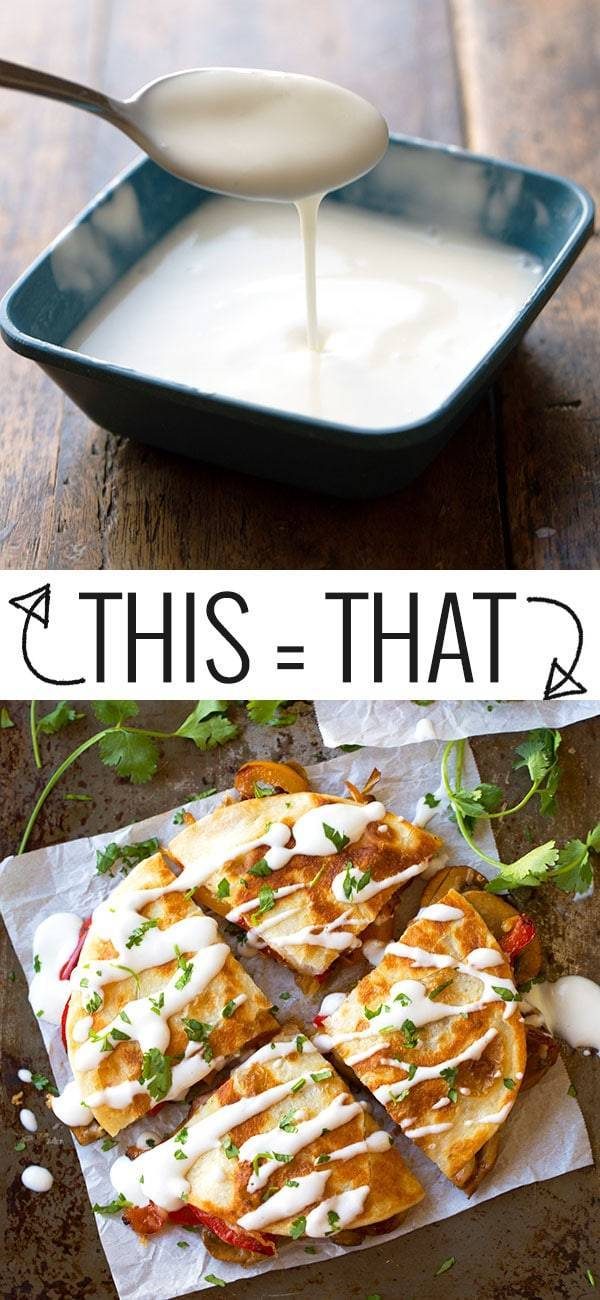
A liquid that is the same color as the dish it is covering will lack visual impact. Successful pour shots rely on high contrast. For instance, a white cream sauce poured over a dark, textured dish or a bright red dressing over vibrant green vegetables creates the necessary visual separation that defines a compelling image.
5. Culinary Manipulation: Viscosity Control
There is a common misconception that the food in advertisements is always "food." In reality, sauces are often thinned with water or thickened with stabilizers to ensure they flow at the perfect rate. If a dressing is too gloppy, it will not form a beautiful ribbon-like stream; adding a small amount of water to the mixture before the shot can significantly improve the final look.
The Role of Support Systems
The debate between using a tripod and hand-holding the camera is a frequent topic of discussion among food bloggers.
- The Tripod Advantage: Using a tripod allows for a consistent frame and gives the photographer the freedom to use both hands—one for the pouring vessel and one for a remote shutter trigger. This is the most professional approach and minimizes the "blobby" mess.
- The "Hand-Held" Method: Many bloggers, due to impatience or limited space, choose to shoot hand-held. This method involves looking through the camera to frame the shot, then looking up to monitor the pour, and repeating this sequence until the timing is aligned. While effective for those who have mastered the rhythm, it is notoriously difficult for beginners.
Implications for Digital Content
The rise of the pour shot has profound implications for how food is marketed online. A static image of a salad is informative; an image of a dressing mid-pour is experiential. This style of photography triggers a sensory response—the viewer can almost smell the ingredients and taste the texture.
For the modern food content creator, the pour shot is an essential tool for building an audience. It establishes a level of professionalism that indicates attention to detail. However, it also serves as a reminder of the "smoke and mirrors" inherent in digital media. The mess on the table, the spilled milk, and the hours of cleaning are rarely seen, but they are the necessary investment for the perfect frame.
Expert Advice for Aspiring Photographers
The most important takeaway for those entering this field is that the pour shot is a muscle memory skill. Like any other form of photography, it requires practice. Professionals recommend that whenever you are preparing a meal that involves a sauce, you take five minutes to practice your pour.

Do not be discouraged by the failures. Even the most successful food photographers in the world acknowledge that for every featured photo on their blog, there are hundreds of discarded, blurry, or misshapen attempts in their archives.
Final Thoughts on Consistency
Ultimately, the goal is to create a sense of movement in a static medium. Whether you are using a tripod, a remote trigger, or simply your own steady hand, the focus should remain on the intersection of the liquid and the dish. By mastering the technical settings of your camera—shutter speed, aperture, and focal point—and understanding the physical properties of the liquids you are working with, you can transform a mundane meal into a work of art that feels as delicious as it looks.
For those interested in delving deeper into these techniques, educational resources such as Tasty Food Photography provide comprehensive guides on manual controls, lighting, and composition, helping creators move past the "trial and error" stage and into a more efficient, professional workflow. The next time you see a perfect pour on your social feed, remember: it wasn’t just a lucky snap—it was a masterclass in preparation.